
How do I enable VPN/firewall settings on the self-service kiosk?
Dec 13, 2025Enabling VPN and firewall settings on a self-service kiosk involves two critical security steps: first, accessing the Host Firewall (e.g., Windows Defender or iptables) with administrative rights to define strict inbound and outbound port rules; and second, installing and configuring a robust VPN client to automatically establish an encrypted tunnel upon system boot. This dual configuration ensures sensitive payment data is protected in transit, adhering to crucial mandates like PCI DSS compliance.
A self-service kiosk, especially one that handles payment or personally identifiable information (PII), is an internet-connected endpoint and a prime target for cyber threats. Proper network configuration is the first line of defense.
The firewall acts as a bouncer, regulating all incoming and outgoing network traffic.
Minimizing Attack Surface: Kiosks typically run a single application. The firewall is used to block all ports except the handful necessary for operation (e.g., HTTPS on port 443, DNS on port 53).
Securing Remote Management: If you manage your kiosk fleet remotely (via RDP, SSH, or VNC), the firewall ensures that the management port is only accessible from your specified internal IP range or through the secured VPN tunnel.
Default-Deny Policy: Best practice dictates a "Default-Deny" rule: block everything, then explicitly allow only what is absolutely necessary.
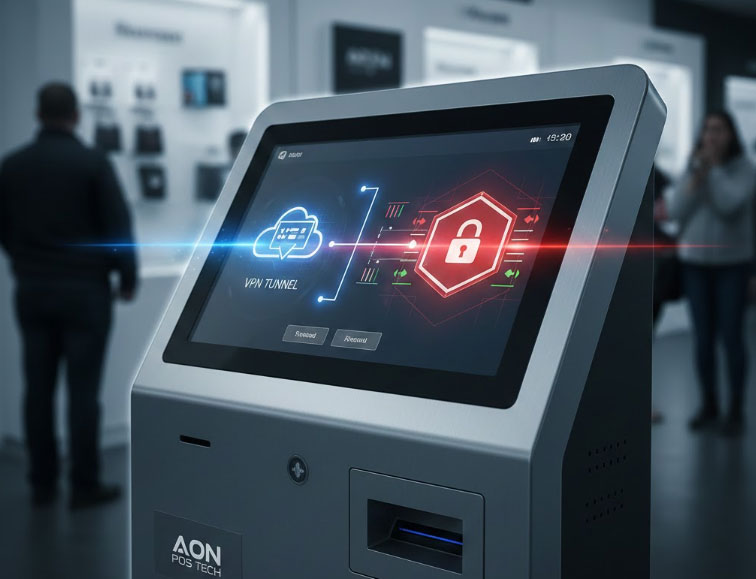
The VPN provides an encrypted tunnel for data transmission, ensuring that data sent between the kiosk and your backend servers is completely shielded from snooping or interception.
PCI DSS Compliance: If your kiosk processes credit card data, the VPN is often a necessary component for meeting PCI DSS requirements for network segmentation and secure data transmission.
IP Masking & Network Segmentation: The VPN can route all kiosk traffic through a central, trusted corporate gateway, making the kiosk effectively part of your private internal network, segmented from the public internet.
Before touching any settings, gather these essential items:
| Requirement | Description |
| Administrative Credentials | You must have the administrator username and password for the kiosk's Operating System (e.g., Windows Professional, Linux). Standard user accounts will not suffice. |
| VPN Configuration Files | Obtain the necessary files from your VPN provider: usually a client installer, configuration files (.ovpn, .conf), and any required certificates or key files. |
| Approved Port List | A definitive list of specific ports that the kiosk must use (e.g., 443 for API calls, 80 for updates, 22 for SSH management). |
| Static IP Address | Ideally, the kiosk should have a static internal IP address or a reserved DHCP address for easier firewall rule creation. |
This guide is generalized for common operating systems like Windows and Linux.
Windows: Open Windows Defender Firewall with Advanced Security (Search: wf.msc).
Linux (iptables/ufw): Use command-line tools like sudo ufw enable and sudo ufw status.
Inbound rules block unwanted connections trying to reach the kiosk.
Navigate to Inbound Rules.
Create a Rule to Block All Traffic: If your OS does not have a "Default Deny," create a custom rule to block all traffic (ports, protocols, profiles) and ensure it is the highest priority.
Create "Allow" Rules: Create new, high-priority rules for essential services:
Management: Allow only RDP (3389) or SSH (22) traffic, and specify the remote IP address of your network admin machine or central server—not the public internet.
VPN Tunnel: Allow the specific port used by your VPN protocol (e.g., UDP 1194 for OpenVPN or UDP 500/4500 for IPsec).
Outbound rules prevent malware or rogue applications from sending data out.
Navigate to Outbound Rules.
Block All by Default: Create a rule to deny all outbound traffic.
Create "Allow" Rules for Essentials:
Allow traffic to your Application Server IP on HTTPS (443).
Allow traffic to the VPN Gateway IP on the specified VPN port.
Allow necessary DNS queries (usually UDP 53).
The VPN configuration must be seamless, resilient, and invisible to the end-user.
Install the client (e.g., OpenVPN, Cisco AnyConnect, WireGuard) using the administrative account. Do not use an integrated OS client unless it supports all necessary corporate features.
The VPN must always be active. A manual connection is a security vulnerability waiting to happen.
Enable System Service: Ensure the VPN client is configured to run as a System Service and not a user-level application.
Auto-Start on Boot: Set the client to automatically launch and attempt connection immediately after the operating system loads.
Persistent Connection: Configure the client's settings or its configuration file to aggressively Auto-Reconnect if the tunnel drops for any reason.
A "Kill Switch" or equivalent setting ensures that if the VPN connection fails, the kiosk's application is blocked from accessing the internet directly.
Best Practice: Use a firewall rule that only allows traffic to exit the machine if it is coming from the VPN's virtual network adapter. If the VPN drops, the virtual adapter disappears, and traffic cannot pass.
The setup is not complete until you verify that the security measures are working.
Reboot the Kiosk: Perform a full power cycle to ensure the VPN client and firewall rules correctly load before the kiosk application.
Verify External IP: After the kiosk boots, use a diagnostic tool or a browser to check its external IP address (e.g., search "What is my IP"). The displayed address must be the IP address of your corporate VPN gateway, not the local site's ISP address.
Negative Test (Firewall Audit):
Attempt to ping or connect to a completely unrelated, non-essential external service (e.g., a random public web server). The connection should be immediately blocked by the outbound firewall rule.
Check Logs: Review the system logs and the VPN client logs for any "connection failed" or "dropped packet" errors to ensure stability.
Tel / Whatsapp : +86 -15999943922
Email : nikki@aonpostech.com


© 2026 Shenzhen Aonpos Technology Co., Ltd .All Rights Reserved