Indoor vs Outdoor Payment Kiosk Machines: Which One Does Your Business Need?
Apr 05, 2026
As you know, the rapid evolution of self-service technologies has led to the widespread deployment of payment kiosks across a broad range of industries, including retail, hospitality, transportation and public services.
Within this context, companies such as Aonpos have been continuously designing and delivering payment kiosk solutions adapted to diverse operational environments and customer expectations.
To address this, it is essential to understand that indoor and outdoor kiosks are not simply variants of the same product. They are designed to meet very different operational, environmental and regulatory requirements, which directly impact their performance, durability and total cost of ownership.
Where are we today?
The current generation of payment kiosks covers a wide spectrum of use cases, ranging from in-store self-checkout and ordering stations to fully unattended outdoor payment terminals for parking, ticketing, or drive-through services.
At Aonpos, our range of payment kiosk solutions has progressively expanded to address both indoor and outdoor deployment scenarios, ensuring compatibility with the specific constraints of each application environment.
Indoor kiosks are now commonly deployed in controlled environments such as shopping centres, restaurants, hotels and airports, where temperature, humidity and security conditions are relatively stable.
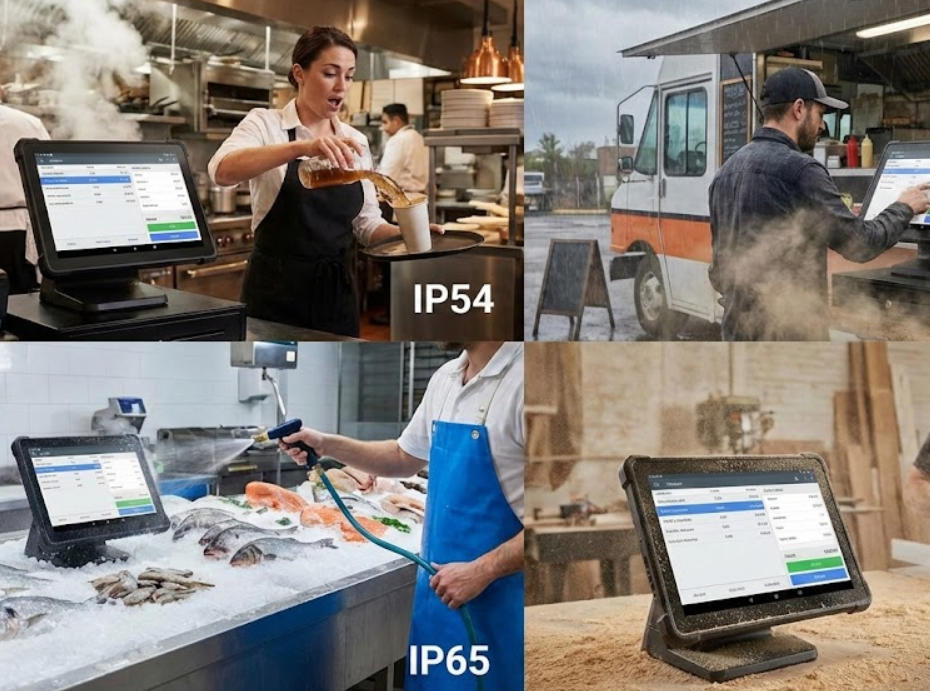
Outdoor kiosks, on the other hand, are designed for installation in open or semi-exposed environments, including streets, transport hubs, petrol stations and public infrastructure, where they must operate reliably under variable and sometimes extreme conditions.
As a result, the decision between indoor and outdoor kiosks has become a strategic one, driven not only by application scenarios but also by long-term operational considerations.
Understanding the key differences
Environmental constraints and durability
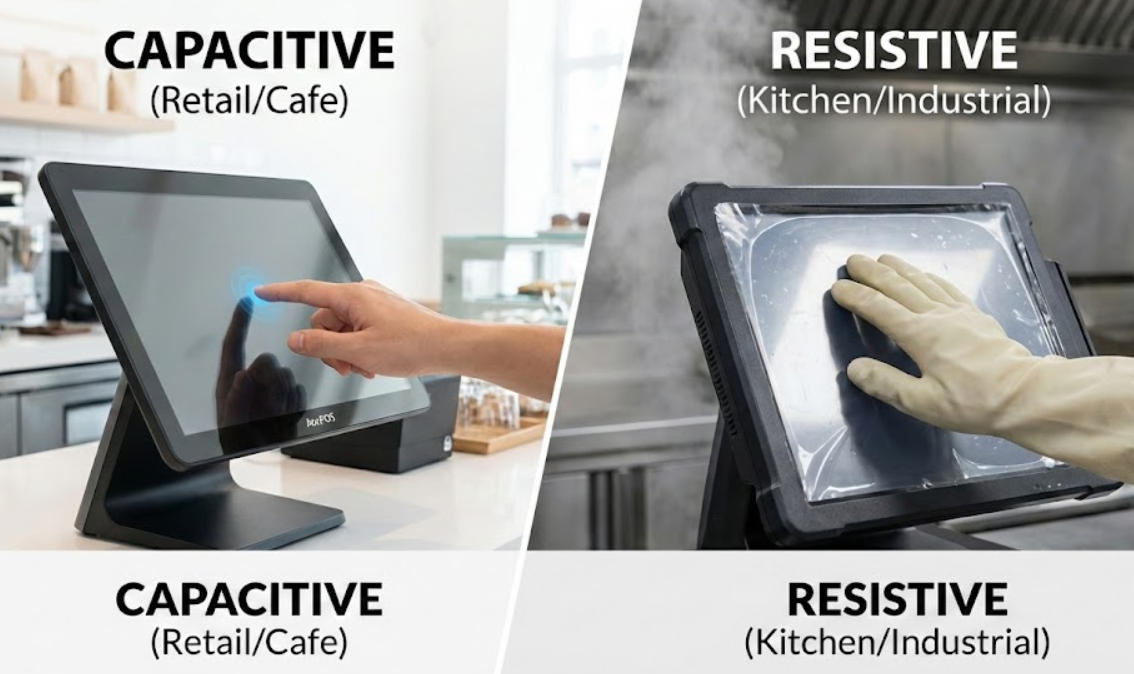
The primary distinction between indoor and outdoor payment kiosks lies in their ability to withstand environmental conditions.
Indoor kiosks are designed for controlled settings. Their enclosures, ventilation systems and components are optimised for standard operating conditions, which allows for lighter structures, simplified cooling mechanisms and reduced manufacturing costs.
Outdoor kiosks, by contrast, must comply with strict requirements in terms of resistance to weather conditions such as rain, dust, humidity and temperature variations.
At Aonpos, this translates into reinforced enclosures, higher protection ratings, anti-corrosion treatments and integrated thermal management systems to ensure continuous operation in demanding environments.
As a result, outdoor kiosks are inherently more complex in their design and industrialisation, which has a direct impact on both initial investment and maintenance strategies.
Security and compliance requirements
Security considerations also differ significantly between indoor and outdoor deployments.
Indoor kiosks benefit from the presence of staff and controlled access environments, which reduces exposure to vandalism and fraud. While they still comply with payment security standards, their physical protection requirements remain moderate.
Outdoor kiosks, on the other hand, must operate in fully unattended environments. This requires enhanced physical security features such as reinforced structures, tamper-resistant locks, secure mounting systems and vandal-proof components.
At Aonpos, particular attention is paid to combining physical security with compliance to international payment standards, ensuring both data protection and equipment integrity in all deployment scenarios.
Installation and deployment flexibility
From a deployment perspective, indoor kiosks offer greater flexibility and ease of installation.
Their lighter weight and simplified infrastructure requirements allow for rapid deployment within existing spaces, often without the need for significant site preparation.
Outdoor kiosks require a more comprehensive approach. Site preparation may include civil works, dedicated electrical installations, weatherproof connectivity and anchoring systems.
Thanks to a modular design approach, Aonpos payment kiosks are engineered to simplify both indoor and outdoor installations, reducing deployment time while maintaining high levels of reliability and safety.
However, once installed, outdoor kiosks enable businesses to extend their services beyond physical premises, offering 24/7 availability and increased customer reach.
Maintenance and operational continuity
Maintenance strategies also differ between the two types of kiosks.
Indoor kiosks benefit from easier access and controlled conditions, which simplifies routine maintenance and reduces intervention costs.
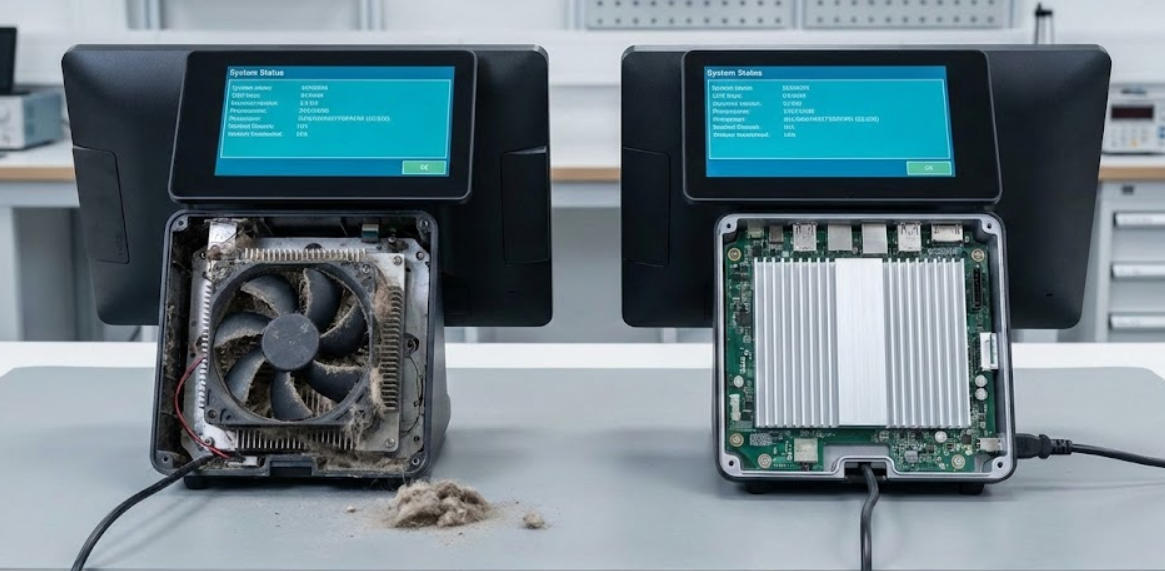
Outdoor kiosks, due to their exposure, require more robust maintenance planning. Remote monitoring, predictive diagnostics and modular component design become essential to minimise downtime.
In this respect, Aonpos integrates remote management capabilities into its kiosk solutions, allowing operators to monitor system status, control peripherals and perform diagnostics without requiring systematic on-site intervention.
Choosing the right solution for your business
The choice between indoor and outdoor payment kiosks ultimately depends on the specific needs and constraints of each business.
Indoor kiosks are particularly well suited for:
High-traffic indoor environments with controlled conditions
Retail and hospitality applications requiring fast deployment
Cost-sensitive projects with simplified maintenance needs
Outdoor kiosks are more appropriate for:
Unattended or public environments requiring 24/7 availability
Services extending beyond traditional premises
Operations requiring high durability and environmental resistance
With its diversified product portfolio, Aonpos supports businesses in selecting and deploying the most appropriate kiosk configurations according to their operational and geographical requirements.
Conclusion: aligning technology with operational objectives
By carefully evaluating environmental constraints, security requirements, deployment conditions and maintenance strategies, businesses can select the type of payment kiosk that best aligns with their operational objectives.
Indoor and outdoor kiosks each offer distinct advantages, but their effectiveness ultimately depends on how well they are integrated into the overall service ecosystem.
Through a structured approach to design, deployment and lifecycle management, and with the support of experienced solution providers such as Aonpos, it is possible to optimise both performance and costs, while delivering reliable and scalable self-service solutions tailored to each specific use case.